aHR0cDovL2ZyZWVzaGlwLmNvLmty Item specifics
- is_customized:
- Yes
- Type:
- Plate Exposure
- Brand Name:
- cheonet
- Condition:
- New
- Automatic Grade:
- Automatic
- Type:
- Vacuum Exposure Unit
- Useage:
- Screen Plate Making
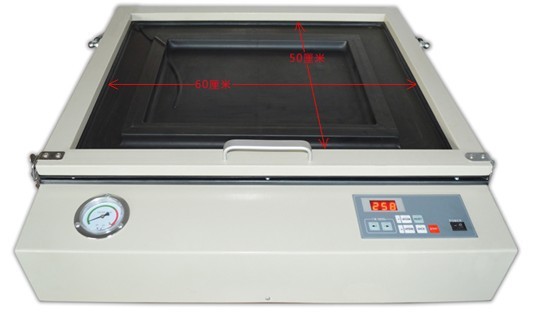
- Exposure Area:
- 50cmx60cm
Packaging Details
- Unit Type:
- set
- Package Weight:
- 38.000kg (83.78lb.)
- Package Size:
- 83cm x 81cm x 28cm (32.68in x 31.89in x 11.02in)
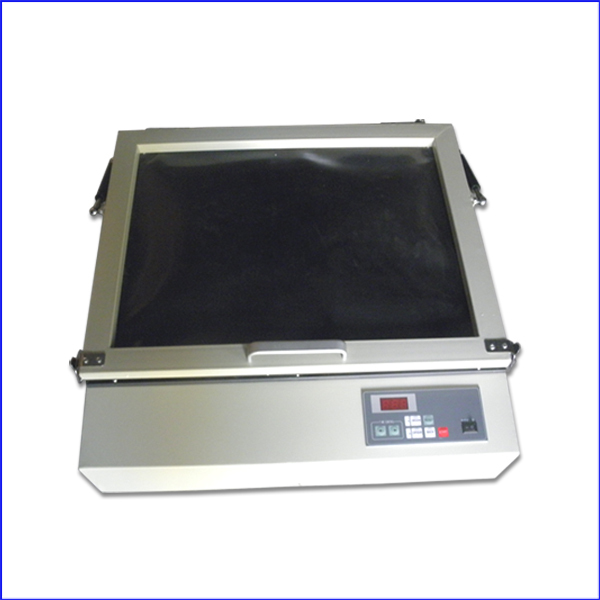
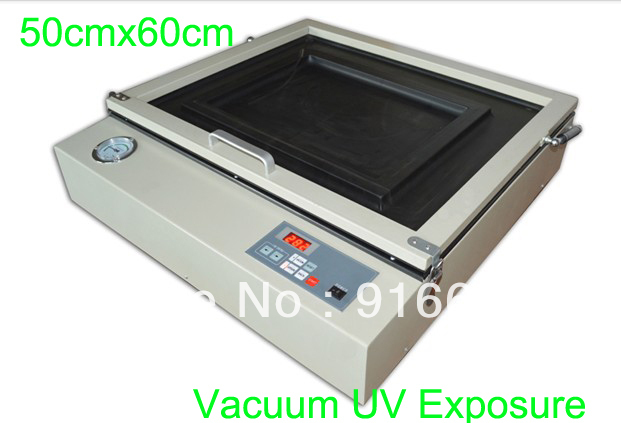
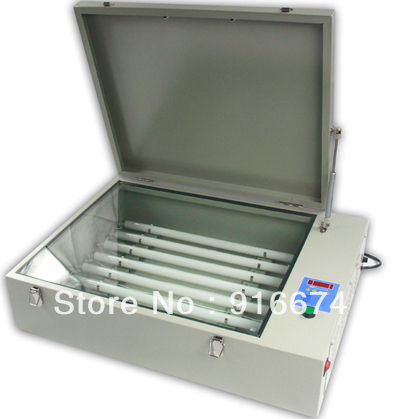
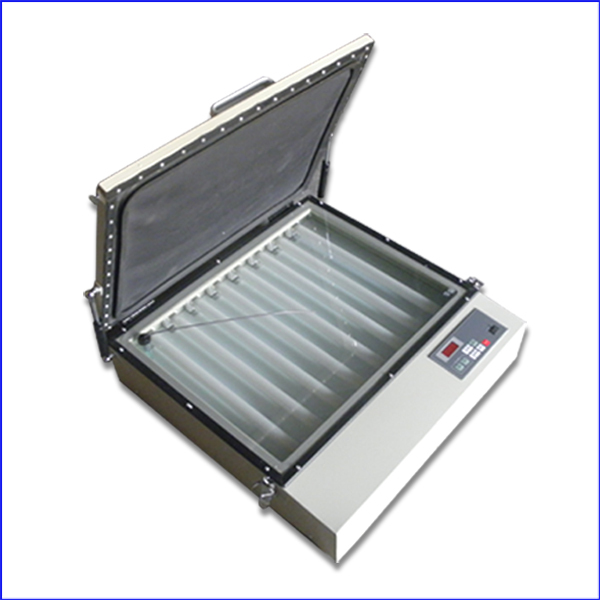
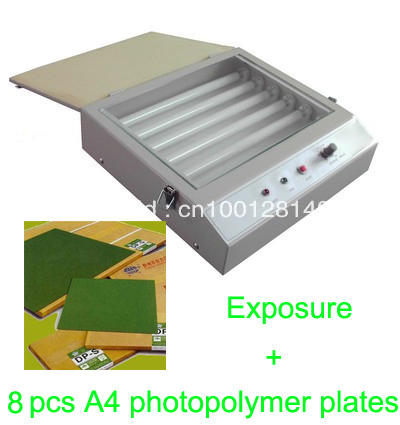
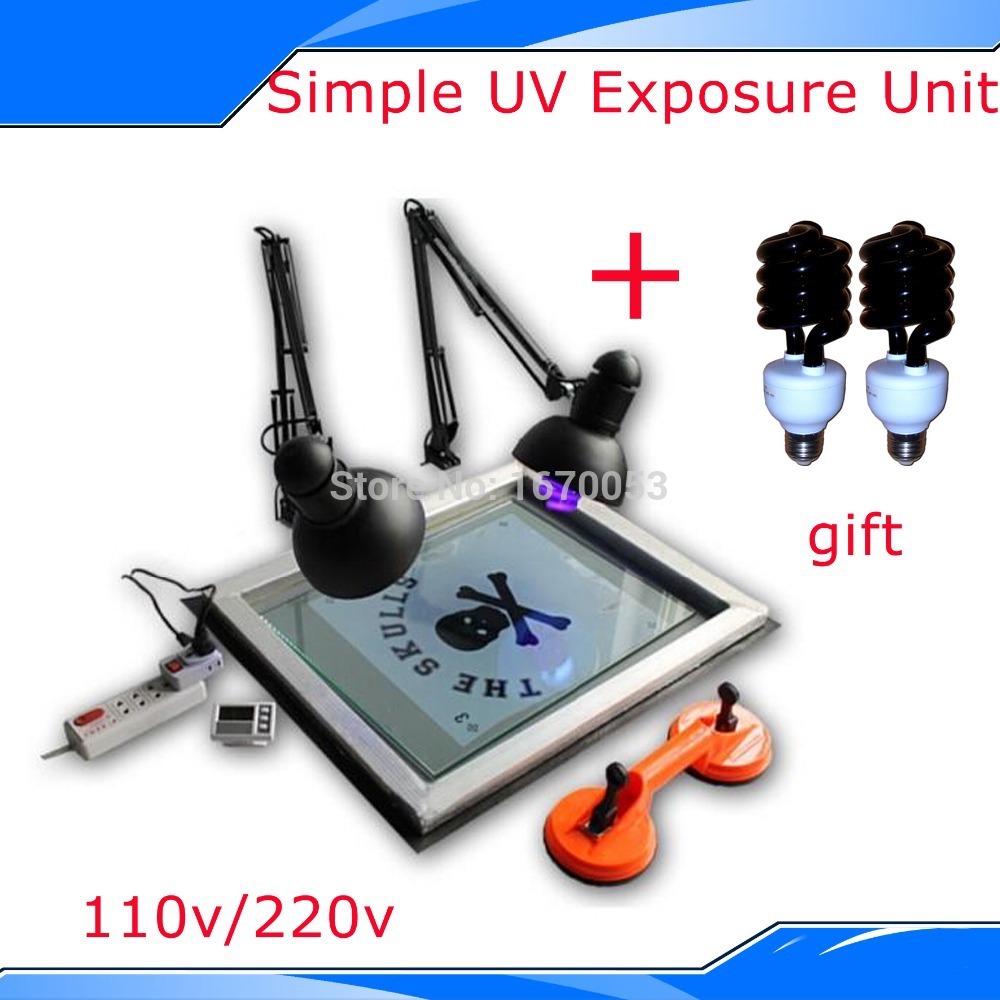
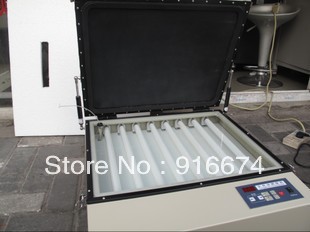
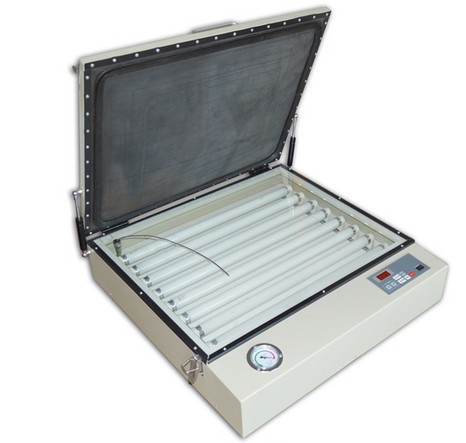
Precise 50cmx60cm Vacuum UV Exposure Unit
Exposure Unit is an absolutely necessary equipment during screen plate making process.
Working Principle
Screen printing screens are coated with a light sensitive emulsion using a scoop coater. When the emulsion is dry, place a positive print of your image on the screen. Once you burn the screen, the emulsion that did not get any UV will wash out of the screen exposing the tiny pin holes. The surrounding areas that were exposed to UV will be cured. Hence the ink will pass through screen onto your substrate.
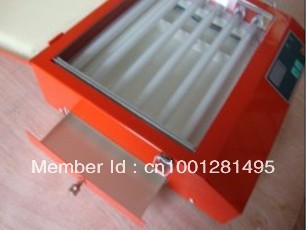
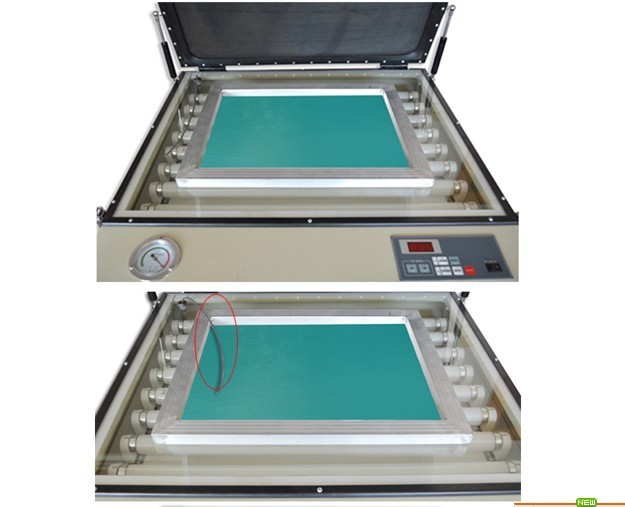
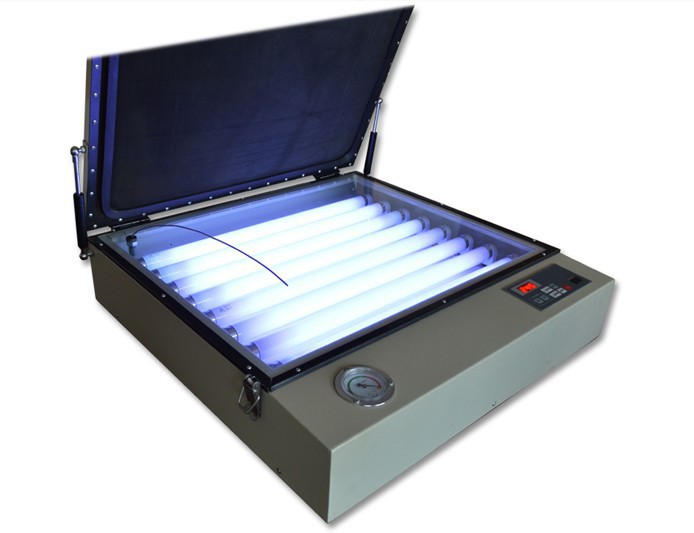
SPE6050ZK Precise Vacuum UV Exposure Unit is equipped with special UV lamps and auxiliary vacuum suction device. After putting the screens and well printed transparency film on the glass, close its cover and let it work after set the needed vacuum and expsoure time, then it will make the screens and transparency film close on the glass tightly by evacuating the air of the vacuum chamer emerging from the rubber blanket. When the set time is up, it will deflate automatically, then the exposure is finished. Please cut off the power supply.
It has the same exposure effect with the exposure unit exposed of iodine gallium light. Even if its exposing time is a little longer, but because of its small volume, light weight, low cost and easy transporation, which is much fit for small business and family workshop for making screens with high precision.
Main Features
1. Rational design & easy operation: based on humanity and practicality principles, with the elaborate designed table type structure, it’s much easier for screen exposure with high precision.
2. Independement settings of vacuum and exposure time with automatic memory function: The vacuum time and exposure time can be set up separately just according to actual requirements (setting ranges: 0-999 seconds); When exposure is finished, the power supply of the lamp will be automatically cut off, it will deflate and beep by itself, then please turn it off. When you need exposure again, just connet the power supply, then it will work automatically according to your former settings because of its automatic memory function.
3. Oilless vacuum pump with high quality is durable with no need for oil injection.
4. 8 pieces of special UV exposure lamps will guarantee a precise and even exposure effect.
5. The high strength toughened glass (thickness: 0.24”/6mm) is with high press resistance and not easily scratched. Besides, once broken, it will turn into pieces without sharp edges to avoid user’s injury.
6. All-metal construction & elegant appearance with advanced electrostatic paintings, easy to clean and no rust.
7. Ellexcent packing in study wooden case as a whole will guarantee a easy and safety transportation.
8. Equipped with spareparts of a UV lamp and a ballast, instuction manual and videos for your smooth usage.
Special Tips:
The vacuum pumping area (sizes of the rubber blanket) is 19.7”*23.6” (50*60cm), but the optimum screen exposing size is within 15.7”*19.7”*1.6” (40*50*4cm) by the outer sizes. (If your screen is oversized, please buy cautiously!)
Essential Parameters
Exposure area: 19.7”*23.6” (50*60cm) (Optimum screen exposing size is within 15.7”*19.7”*1.6” (40*50*4cm) by the outer sizes.)
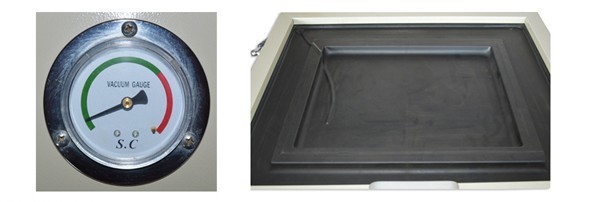
Vacuum Degree: -0.08MPa
Illumination Uniformity: 85%
Lamp Power: 160W
Vacuum Pump Power: 60W
Input Voltage: 220v(110v)
Vacuum Time Setting Range: 0-999s
Exposure Time Setting Range: 0-999s
Machine Size: 30”*28”*7” (76*72*18cm)
Package size: 33”*32”*10” (83*81*28cm)
Net weight: 51Lb / 23kg
Gross weight: 75Lb / 34kg
Operation Instructions
1. Connect the power supply;
2. Turn on the switch of “POWER”;
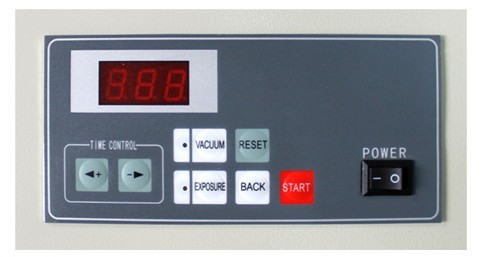
3. Set the vacuum pumping time
1) Press “VACUUM”, the left indicator light (yellow) is lit up;
2) Press “ + ” or “ – ” in the “TIME CONTROL” area to set the vacuum pumping time according to your needs.
(For first-time users, please put an empty screen in the middle of the rubber inner cavity, just set 40 seconds for test; if the pointer of the vacuum gauge could reach or pass the middle of the green area, that’s ok. If not, please extend the time and test again until having reached the requirment.)
4. Set the exposure time:
1) Press “EXPOSURE”, the left indicator light(red) is lit up;
2) Press “ + ” or “ – ” in the “TIME CONTROL” area to set the exposure time according to your needs.
(Exposure time varies according to the coated photosensitive emulsion. Please just set 300 seconds for test and then reset a suitable time according to the exposure effect.)
5. Once finished the above settings, you could start exposure just as follows:
1) Put the screens coated with photosensitive emulsion and the printed transparency film on the glass.
2) Put the air suction pipe in to the screen;
3) Close the cover and click the “START” button, then it will vacuum pump and expose automatically according to the settings;
4) When the set time is up, it will deflate automatically; Open the cover and exposure is finished. Please just cut off the power supply.
6. Functions of other keys:
1) “RESET” for cancelling the previous settings: if you want to reset the vacuum / exposure time, just press “VACUUM” / “EXPOSURE” and the left indicator light is lit up; Then press “RESET” and the original settings will turn to “ 0 ”; Next, you could set according to your needs.
2) “BACK” for stop working: if you want to stop vacuum pumping or exposure, just press the “BACK” button, that’s ok.
Breakdown Maintenance
1. If the digit was not displayed once turned on the switch:
a. Please check whether the power supply is good or not.
b. Please check whether the bottom fuse wire is loose, burned-out or not;
2. If the vacuum pump didn’t work after putting the screen on the glass, closing the cover and pressing the “STRAT” button: please check whether the leading wire of the vacuum pump is well connected or not.
3. If it didn’t reach the requirement enven the vacuum pump works well:
a. please check whether the air suction pipe is well fastened or not;
b. Please check whether the rubber blanket and its edgings were good and seal or not. If there were some splits on the rubber blankets or edgings, or some cracks of the edging adhesives, please fix them up with the sealing adhesive.
4. If the lamps were not lit up:
a. Please check whether your voltage was too low or not;
b. Please check whether the lamp ends were blackned or not caused by lamp ageing;
c. Please check whether your set exposure time was 0 second.
d.Please check whether the ballast was broken or not.
Notes:
1) Please cut off the power supply when you need to change the lamp or the ballast!
2) Avoid contact with hard objects to provent glass surface scratching.
3) Consistant cleaning is needed according to your using frequency and operational environment, espeically for the glass, vacuum rubber blanket and edgings.


 배송기간
배송기간